Saturday, February 15, 2014

ArranBee Nancy repair


This sweet little girl came to me with earlier repairs.  Not to disparage whoever did them, they made a common mistake - making a vintage doll look new.  Also, the detail work was not particularly skillful.  Nancy had other issues - cracks in the composition, a bad split at the back of the head, a missing eyelash, very poorly repaired toes, broken fingers, and on and on.  You could certainly tell she had been loved!  The original owner asked for her dolly to be restored to the shape and look she remembered.  I started off by searching for photos of Arranbee Nancy's so I had an example to follow when restoring the poorly painted hair and face.

Nancy (not the patient) by ArranBee


This is what poor little Nancy looked like when she came to me.


Not too much is needed to say, I suppose.  The photos speak loudly in themselves! 
 
I find one fault of other doll repair artists whose work I end up re-doing is that they often use paint colors 'straight out of the bottle'.  Older dolls have tones which are no longer available, as well as a patina that has aged and altered them.  You have to mix.  It is impossible to use modern paints to achieve a vintage look.  Note the poorly-painted and placed eyebrows; the wrong color of hair.  The too red lips, and the many, many places with missing paint.  If you look closely you will also see that the fingers and toes which were 'restored' are very poorly done.  Comparing them to the way I work, they were left half (if that) finished.
 
Anyhow, all damaged areas were cracked out and an appropriate filler was used to recreate the original skin.  Most of the damage of this type was over the areas where plaster of Paris was used to cement the two halves of the doll's head or body, etc. together.  Plaster of Paris gathers water and caused the skin 'eruptions'.  I sealed it first before adding Nancy's new 'skin'.


Next came the 'fine' work.  Nancy's hair had waves in it.  By cracking out the large area I had to, I eliminated those waves.  I have to rebuild them by using a thinned solution of the filler I used on the legs, head, and other.  It was a process that took at least five layers.


Here she with every part - head, torso, arms, legs, hands, feet and toes all filled, sanded and sealed before painting begins.


Now comes the detailing.  I always use reference photos for this work as I want the doll to look as much like the original as possible.  The photo at the top of this post is of an aged Nancy.  I had others that showed her hair to have been much more solid originally, and that is what I went with - a lovely deep auburn hair tone that really set off her little face. 
 
One interesting note: replacing a vintage doll eyelash.  You can buy old eyes and remove them from the set, but then - of course - you have a one-eyed-lash set left.  I usually make mine from old paintbrushes.  The trouble with this doll was that the old lash was of an odd color and hard in places.  I actually painted and 'aged' the new lash to match as best it could.


And here she is complete and in her original repaired costume. 


Nancy has gone home now, but her little friends - Sonja and Grace - have come to visit the doll hospital.  I may detail their journeys here as well sometime soon.
 

Friday, February 14, 2014

Progress so far


Just a quick post to show the progress so far on last month's ladies.  These two are awaiting their dresses.  


And this is my $5 doll.  Hair and eyes are next.


I managed to squeeze another repair in and will be blogging about it fairly soon.  The 'patient' was a 14 inch ArranBee Nancy composition doll. 

More soon!

Saturday, January 25, 2014

Brrrrrrrrrrrrr....it's cold. Time to work on dolls.


It's been two months since I posted - where does the time go?  Of course, for my husband and I with our retail business, I really know where it went - November and December flew by with preparation for, and then Christmas selling and decorating.  Our consignment business www.davidfaironthesquare.com offers home and business decorating during the holiday season.  I know we decorated for over a dozen clients this year.  Add that to Christmas sales and, well, there's no time for repair.

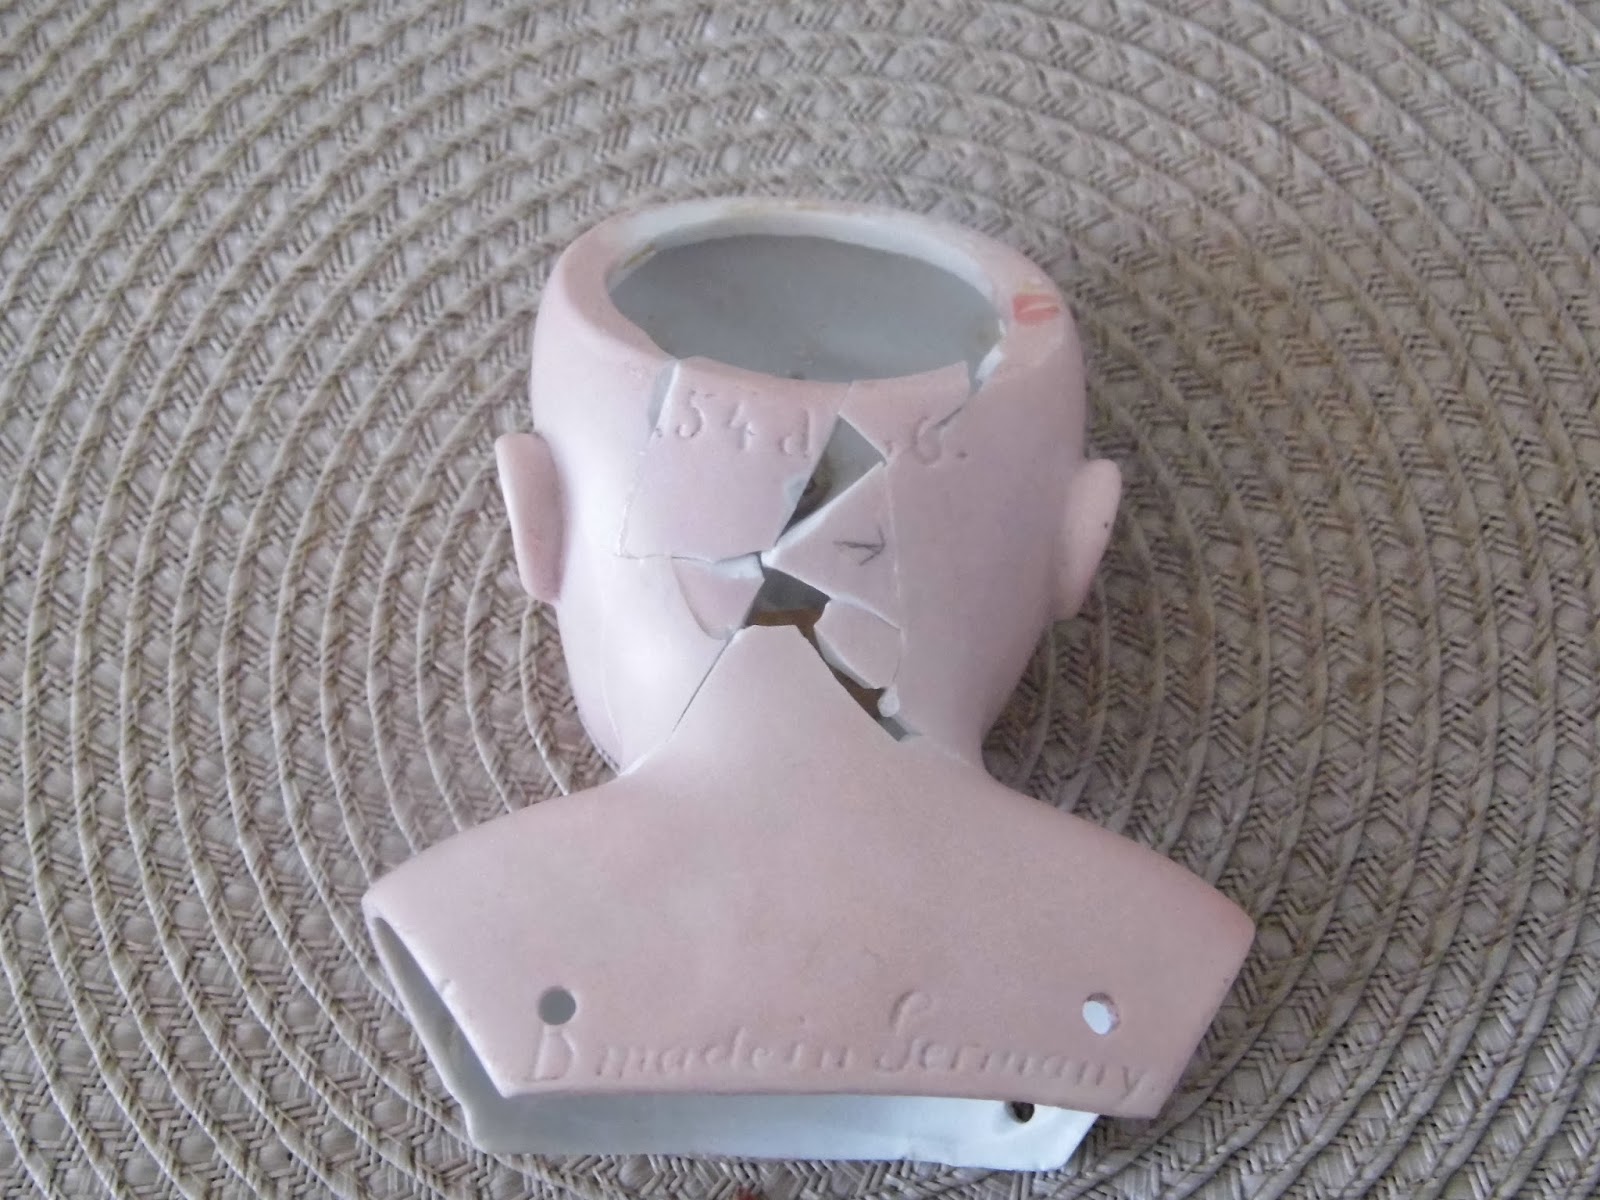
Anyhow, I still haven't found time to work on my own projects.  My big Lenci, my millener;s, etc. are all waiting on their day.  What I have been working on is customers' dolls.  I thought I would share the 'treatment' my current patients are ungoing.  Right now I have two china heads I am working on, one early pink lustre and another later Common Lowbrow.  I just finished working on a poor little Kestner who took a great fall and lost the back of her head.  And last of all, I am working on a German #7 that has the look of a Revalo, but is unmarked.  My daughter runs estate sales www.bdestatesales.com  She called me one day and told me there was an old doll in a box in an estate sale she was helping set up.  The price was $5.  Imagine my surprise when I found, in the box, a complete ball-joint German dolly, app. 21" tall, with all of her parts, original wig, etc., all in great shape with one exception - a broken head.

I can fix that, I told her!

So here, along with some commentary, are my latest doll doctor successes.

The first doll is a lovely Pink Lustre China head from the Civil War period or slightly after.  Her story is an interesting one.  Apparently the original owner did not like the fact that the one leg had been broken, and so she cut both legs off and replaced them with modern reproductions.  The daughter of the owner wants the doll restored to its original condition and the leg fixed. 

The doll's body was pretty much intact, with the exception of a large area where sawdust was leaking.  In order to preserve as much of the original body as I could, I chose not to replace it but closed off the leakage, filled the area, and then sleeved the body with antique fabric.  I could have tossed the old body and put the head on a replacement one, but if possible I would rather preserve the original.  I took a pair of legs from a contemporary body I had in stock and then made new arms to match.  I chose to have the arms end at a more natural point than they had originally. 

The leg was first glued, and then filled and finally painted to match its whole mate. 

Now she's waiting for her dress.  Once I have her completed, I will post a finished photo.


Pretty lady


Her mess of a torso.


Broken leg


The repaired leg before a gloss coat was added.


Waiting for her trousseau.


The second china head, as stated, is a Common Lowbrow, most likely dating between 1890 and 1910.  Dolls with this hairstyle was made by the thousands.  This is a very fine high quality example as she is well painted, with orange lid lines, etc. that would have taken more time and cost more to produce.  Her story is interesting as well.  Apparently there was a fire and the little girl's doll was broken.  The question is - was a bisque head broken and replaced with a china head, or a china doll's body broken and the head put on a spare leather body meant for a bisque head?  Whatever happened, what you see here is a body meant to hold a pink tinted bisque head (like the next doll in the post), but one that instead has a china head.  Usually you find it the other way round - the earlier china head was broken and a bisque, tin, or composition one used to replace it.  The customers and I talked and they decided to keep her as original as possible, so even the fabric used to hold the broken head on will be cleaned, mended and replace. 


This is the piece of fabric that was holding the head on, before and after.


Condition of the leather body and the damaged foot.
 
 
Cleaned, mended and restored. 

 
This is the cleaned body, but still with her old arm and hand. 
She still needs new upper arms and china lowers.
 
 
This girl is not finished yet so, again, I will post a photo once she is together and has her wardrobe.
 
Next to last is the little Kestner with the broken head.  I think the photos speak for themselves.
 
 
First step - jigsaw puzzle!


Filled, sanded and sealed.

 
Undercoating
 
 
Final coat

 
Completed!


My last patient is only at the beginning of her 'treatment'.  I call her my $5 doll.  The pieces of the head fit together quite well and I am still determining whether or not I will fill and paint the hairline cracks remaining as they are nearly invisible.  The main repair needed is actually a reconstruction of the bottom of the neck so that the head can once again be mounted on a body and strung.  This is a challenge as the repair has to be able to withstand the pressure of the elastic that holds the ball-joint body together. 
 
Here's what I have done so far....


That's it for this time.  I will post again as soon as one of these little beauties is actually released!